Correzione deformazioni con photoshop


Tutorials Photoshop

(Picture 1 - ©Copyright by Marco Pollini, all rights reserved 2013)
- ITA -
Quante volte ci è capitato, durante l'uso di una fotocamera compatta, mirrorless o reflex di notare talvolta, in particolar modo a focali grandangolari, una deformazione dell'immagine. Vediamo come correggerla con Photoshop.
Un tipico esempio è l'immagine n°1, dove l'orizzonte è chiaramente affetto da deformazione del barilotto dovuta dall'aberrazione sferica delle ottiche. In questo caso linee rette diventano linee curve. A 24mm o ancora meglio a 18mm conta molto la qualità delle lenti ma anche a livelli superiori, essendo maggiore l'angolo di campo, questo difetto prima o poi salta fuori!
Vediamo cosa fare!
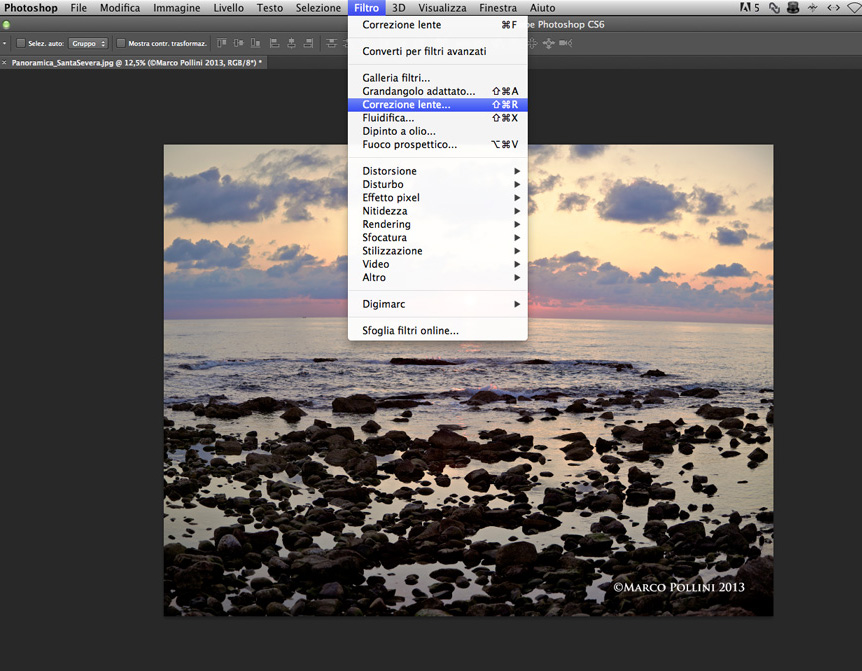
- Apriamo l'immagine in Photoshop, eseguiamo le nostre correzioni, se necessarie, dunque andiamo sul menù in alto e cerchiamo la voce "Filtro -> Correzione lente".
(Picture 2 - ©Copyright by Marco Pollini, all rights reserved 2013)
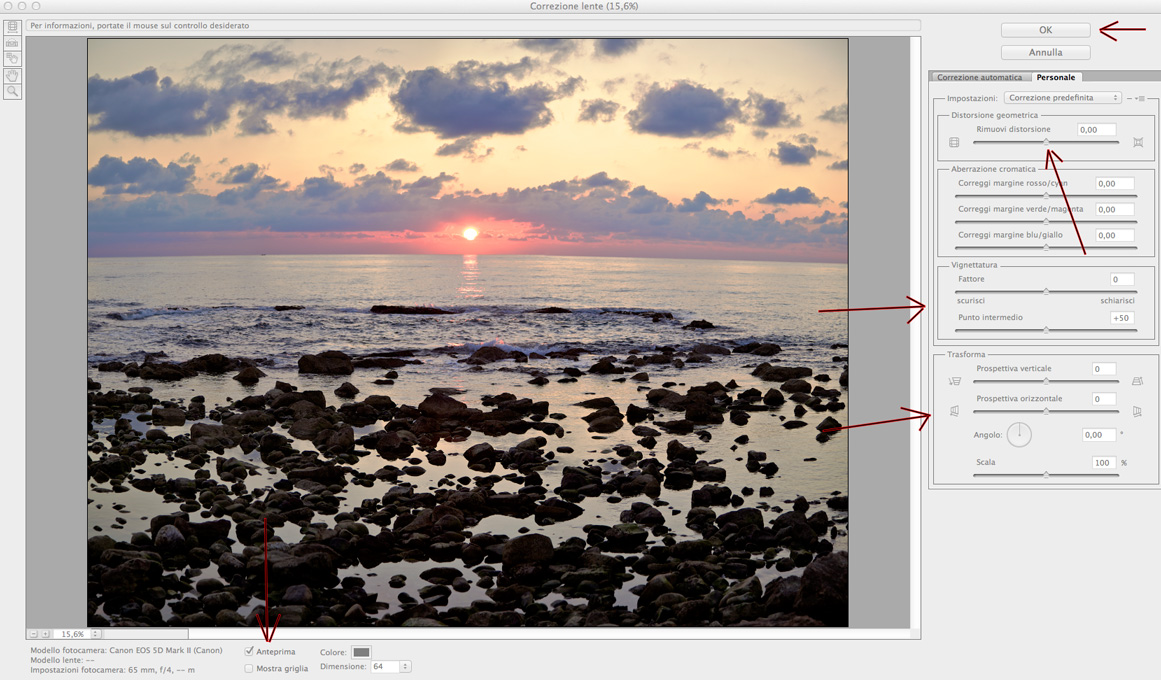
Si aprirà una finestra molto interessante con varie opzioni. Per adesso concentriamoci sul pannello "personale".
(Picture 3 - ©Copyright by Marco Pollini, all rights reserved 2013)
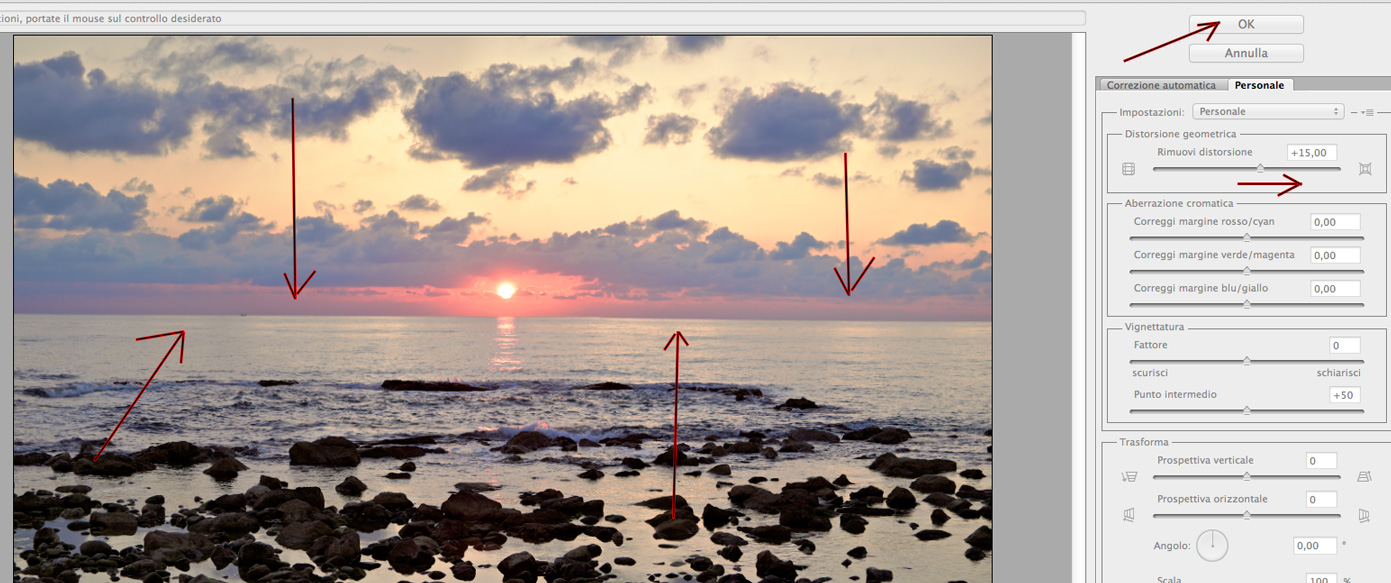
In alto a destra è possibile osservare, all'interno del riquadro "distorsione geometrica", una piccola leva proprio utile al nostro scopo! Spostandola verso destra si eseguirà una correzione dell'intera immagine di tipo concava mentre spostandola verso sinistra si eseguirà una correzione dell'immagine di tipo convessa.
(Picture 4 - ©Copyright by Marco Pollini, all rights reserved 2013)
A questo punto non vi resta che provare fino a quando l'immagine non risulterà con dei lineamenti perfettamente rettilinei o quasi.
In aggiunta, molto utile, sarà possibile correggere vignettatura, altro problema ai bordi di molti obiettivi grandangolari, l'aberrazione cromatica ed infine la prospettiva verticale ed orizzontale.
In basso sono indicate le opzioni relative all'attivazione di una anteprima dei vostri cambiamenti e i dati dell'immagine.
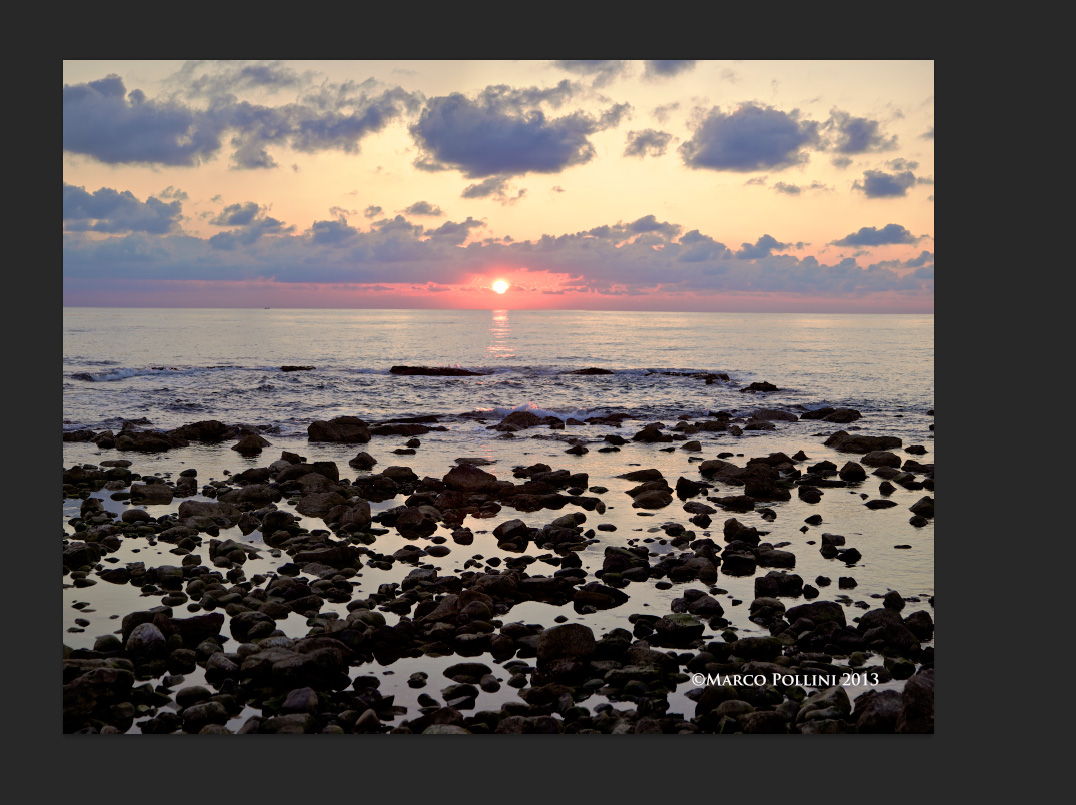
Una volta terminate le modifiche, premete sul pulsante "ok" ed il gioco è fatto la vostra immagine è ora molto più gradevole e bella !
(Picture 5 - ©Copyright by Marco Pollini, all rights reserved 2013)
Buon lavoro!
- ENG -
How many times has it happened, when using a compact camera, mirrorless or SLR note sometimes, especially at the wide-angle, a distortion of the image. Let's see how to correct it with Photoshop.
A typical example is the picture No. 1, where the horizon is clearly affected by deformation of the barrel due to spherical aberration of the optics. In this case, the straight lines become curved lines. A 24mm to 18mm or better still matters a lot the quality of the lenses but also at higher levels, being greater the angle of view, this defect sooner or later it turns out!
Let's see what to do!
- Open the image in Photoshop, we perform our corrections, if necessary, then we go to the top menu and try the "Filter -> Lens Correction." (Picture n°2)
A window will open with several very interesting options. For now, let's focus on the panel "personal". (Picture n°3)
At the top right you can see, inside the box "geometric distortion", a small lever just useful for our purpose! Moving it to the right will perform a correction of the entire image type concave while moving it to the left will run a correction of the image of convex type. (Picture n°4)
At this point you just have to try until the image will not be with the features perfectly straight or nearly so.
In addition, very useful, you can correct vignetting, another problem at the edges of many wide-angle lenses, chromatic aberration, and finally the vertical and horizontal perspective.
At the bottom are shown the options for activating a preview of your changes and the image data.
Once you are finished making changes, press the button "ok" and you're done your picture is now much more pleasant and beautiful! (Picture n°5)
